Tuesday, December 22, 2009

Comfort and Joy- Mashed Potatoes and Mac and Cheese

I got a new issue of Simple and Delicious magazine and I bet you can guess the theme..."Classic Comforts!" I usually find one or two recipes to try in each magazine but this time I found seven! The first two have been moderate successes, so I thought I would share them with you.

Recipe number one was "Crunchy Mashed Potatoes." I will admit that it had me at "1 and 1/2 cups cheddar french-fried onions." I love those things. This recipe was so easy that it actually came together too fast. I barely had time to get everything together. I also try to clean as I go and put away ingredients that I've already used (a habit of cooking in a small kitchen for five years) but there was not a second to spare. Once the three cups of chicken broth came to a boil it was non-stop action for all of 30 seconds. I'm not joking. I added 1 cup of milk, 1 pressed garlic glove, 1/4 tsp of pepper, 3 cups of potato flakes, and 1/4 cup sour cream and whisked until it was smooth. Then it went into a casserole dish, got sprinkled with the french -fried onions and 1/4 cup of parmesan cheese, and went under the broiler for about 1 minute. I didn't even have enough time to zap hot dogs in the microwave. Fancy dinner huh? I joke, but Brett was soooo happy to have hot dogs.

It tasted good, but Brett and I concluded that it needed butter. I also conferred with my mom (the queen of potato flakes) and she uses evaporated milk instead of regular, which adds creaminess.


The second recipe that I tried was called "Spirals and Cheese." This one used a lot of pots, which I don't like, but was very easy, which I do like. While 3 and 1/2 cups of rotini were cooking to just underdone, I melted 3 T of butter combined it with 3 T of flour and gradually added 3 cups of milk. When that had thickened after a couple of minutes, I added 2 cups of cheddar cheese, 1/2 a cup of parmesan cheese, and 1/2 tsp each of salt and pepper.

I drained the pasta, and poured it all back into the same pot and then added the cheese sauce. It was very thin. So thin that I thought I had done something wrong. I poured it all into a baking dish and crossed my fingers.

In yet another pot I melted 1 T of butter and added 1/2 cup of dry bread crumbs, 1/2 cup of cheddar cheese, and 1/4 cup of parmesan cheese. This only took about 10 seconds of stirring and then I sprinkled it all over the noodle mixture.

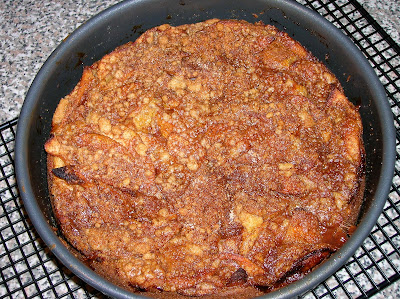
It went into the 400 degree oven for 20 minutes and came out perfect. It did taste good, but it was a little bland. We think it could have used some cajun seasoning or bacon... or both. Three pots and one casserole dish later I was starting to think how much I like Kraft macaroni and cheese.

Merry Christmas everyone!

Friday, December 18, 2009

Gingerbread House

Over the weekend Brett started work on his gingerbread house. Sunday night he mixed up a double batch of dough.

Monday night he meticulously rolled, measured, and cut the walls, roof, and base of his house. Before baking he placed Jolly Ranchers in the window holes. When the cookies baked the Jolly Ranchers melted and formed translucent window panes. We were so excited that this technique worked! I think we had seen someone do it years ago on the Food Network and we finally got around to trying it. Don't try this without a Silpat; it would be a disaster! When everything cooled, the cookies and windows pulled right off without a hitch.

Wednesday night Brett whipped up some royal icing and got to work on construction. Compared to the measuring and baking, the construction was relatively fast- only 3 hours! We made a path out of M&M's, a door out of Hershey bar, and a gate/trellis/arbor/whatever-you-call-it out of candy canes. Brett also carefully piped little picket fences onto the Silpat. My only real contribution (because nibbling on M&M's and candy canes doesn't count) to this whole project was the little chimney made out of red M&M's.

We wanted the roof to be good and dry before we added shingles, so Thursday night was Andes mint shingles night! Brett also plucked the fences right off the Silpat and secured them to the base with royal icing. He added some finishing touches and just barely had enough icing.

I've made a video of some of the process and included some of the still photos that I took before I remembered we have a video camera. We got a free Flip video camera for paying our cable bill on time two months in a row! I actually really like it, so you may see more videos popping up on the blog... if there's something interesting enough to video. Enjoy!

Wednesday, December 16, 2009

Christmas Candies

Brett and I spent a good majority of the weekend in the kitchen (we spent a minority of the weekend watching a Ninja Warrior marathon) and we ended up using almost five sticks of butter. Yes, that sounds like a lot. Yes, I feel like Ina Garten or Paula Deen. No, we did not eat all that butter, nor will we be consuming it over an extended period of time. In today's post I will be telling you how we used two and a half sticks of butter. I will save the other two for my next post.

I got it in my head that I wanted to make homemade peppermint patties. We've made homemade fondant filling for candy before, but it was a sticky, goopy, time-consuming, arm-deadening disaster. It was one of those things that could not get any worse, so it had to be better the second time! Making fondant requires a candy thermometer and a strong stirring arm. We heated 1 and 1/3 cups of water, 1/3 cup light corn syrup, 1/4 cup of butter, 4 cups of sugar, 1/4 tsp cream of tartar, and 1/8 tsp salt to 240 degrees. I manned the thermometer while Brett washed the sides of the saucepan with a wet pastry brush.

Brett poured the liquid into a 9x13 pan and we left it in the fridge until the pan didn't feel warm anymore.

Then the stirring began. We soon added 1/4 tsp of peppermint extract. It starts out thick and sticky.

We worked in shifts. When my hand hurt or my arm got tired, Brett would take over. For a while it seemed to firm up a little, but the second it felt like it was actually getting thinner, we let it rest. The last time Brett made this all by himself and he stirred it for an hour before he let it rest. We try to learn from our mistakes. After about thirty minutes we let it rest for five and this made all the difference in the world.

It quickly turned to this:

Then we formed it into little peppermint patty fillings. Brett's are the beautiful, perfectly round ones and mine are the lumpy, misshapen ones. We ended up with 136! We let them rest overnight to come to room temperature and form a little crust before we dipped them in semi-sweet chocolate.

Sooooo messy! But sooooo fun! I pretty much licked chocolate off my hands for lunch. (Don't worry, I washed them before touching any candies again.)

Isn't our tree cute? Can you spot Homer, Marge, Bart, and Lisa? Can you believe that this is our fifth married Christmas, yet our first Christmas tree?

Our next endeavor was the Coffee Toffees that I saw on Zoe's blog recently. This time Brett manned the thermometer while I whisked the butter, sugar, brown sugar, molasses, water, and instant coffee powder together. Brett was not pleased with the heating rate, so we cranked it up to medium-high.

Every sugar challenge I've watched on Food Network warns of the dangers of sugar burns, so I let Brett's steady hand do the pouring. I love sil-pats! I spread the sugar out with a flat spatula as quickly as I could and then Brett got ready with the pizza wheel. The recipe said to work quickly before the sugar hardened, but we actually worked too quickly. Brett's gentle cuts (so we wouldn't damage one of our beloved sil-pats) were going back together almost immediately so he kept rotating through and making new cuts until they finally stayed.

The mixture came to room temperature pretty quickly and was soon ready to be broken along the cut lines.
I dipped these in melted semi- sweet chocolate using a fork instead of my fingers.

Overall, our candy turned out delicious. I can't even begin to choose a favorite. The only problem we had was when the chocolate hardened. Some of our pieces "bloomed." This means that the chocolate became discolored. I actually think that it looks kind of neat. Some of the mints got little lizard spots on them. The discoloration does not affect the flavor at all, so I really don't care, but it is something to study up on for improving our candies next time.

We shipped tins of our candies to loved ones across the country as our little attempt at spreading some Christmas cheer. Afterall, who doesn't love homemade goodies?

Friday, December 11, 2009

Mamma's Cornbread Dressing

Every year at Thanksgiving my grandma makes her cornbread dressing and every year it is one of my favorite parts of Thanksgiving. The recipe is no secret. She gladly shares it. I've tried to make it with disastrous results. The first time there was WAY too much sage. But I followed the recipe! So I asked Mamma, "Are you sure there's 1 Tablespoon of sage?" She was sure. The second time I tried to make it it was WAY too soupy. "Mamma, are you sure there are 5 cups of chicken broth?" She was sure.

You know what they say about the third time? I went with my gut (instead of the recipe) and it was indeed the charm.

I prepped all of the ingredients, which for this recipe means to make some cornbread in advance, boil and chop 4 eggs, and chop onions and celery.

Cornbread was one of the first things I ever made on my own, so I should know what I'm doing, but for whatever reason (I'll blame the oven) this cornbread needed to cook much longer than normal. I had already cut it up before I realized that the center was still batter. Oops!

In addition to the cornbread, you are supposed to tear up a few pieces of white bread. I had two sandwich rolls that were "on their way out" so I started tearing those up into a bowl. About half way through the first roll, I glanced at the other roll and saw a green dot of mold. Ugh! I sifted back through the torn pieces and found one green spot that I took out. I really hope that was it. The other roll went in the trash.

When I added the sage I went with one teaspoon instead of one Tablespoon. Despite what Mamma says, I'm convinced that there's a typo in my recipe.

I stirred up all the dry ingredients and then I poured a melted stick of butter over everything and started adding chicken broth. Instead of pouring in five cups and calling it a day, I poured a little, stirred it up, and then poured some more. I got it to the consistency I like after about 3 cups (a little soupy) gave it a taste for seasoning (see I'm learning!) and then added the raw eggs.

I baked it off, and I must say that it turned out pretty darn close to Mamma's, although not quite as good of course. Yum!

Mamma's Cornbread Dressing (with Kim's aforementioned tweaks)
1 pan of cornbread
3-4 slices of white bread
4 eggs, boiled and chopped
3 eggs, raw
1/2 cup melted butter
1 cup chopped onion
1 cup chopped celery
1/2 teaspoon pepper
1/2 Tablespoon salt
1 teaspoon sage
3-4 cups of chicken broth (enough to make slightly soupy)

Mix cornbread and white bread crumbs in a large bowl. Add salt, pepper, and sage. Mix well. Add onion, celery, and boiled eggs. Mix well. Add melted butter and gradually add in the broth. Mix well. Add raw eggs. Mix well.

Pour into a greased 13x9 inch baking dish. Bake in a 350 degree oven for about 40 minutes.

Tuesday, December 8, 2009

Blackberry French Toast

My mom found this recipe in a recent issue of Southern Living and tried it out on us while we were in California for Thanksgiving. Brett and I are known for eating breakfast for dinner, but this is one of those breakfasts that could easily pass as a dessert, so that's what I did! I also halved the recipe for just the two of us because the whole recipe makes a ton.

First I cubed up half a loaf of french bread and put half of the cubes in a greased casserole dish.

Then I melted 1/2 a cup of seedless blackberry jam over medium heat for a couple of minutes.

Then I cubed up half a block of Neufchatel cheese (you could use 1/3 less fat cream cheese) and sprinkled them on top of the bread cubes. I made sure to make really small cubes. The one improvement I wanted to make over my mom's was to have less overwhelmingly "cream cheesy" bites.

Then I poured the melted jam over that and topped it with the rest of the bread cubes.

In a separate bowl I whisked together 2 eggs, 1 cup of milk (the recipe calls for half and half), 1/2 a tsp of vanilla, and 1 tsp of cinnamon. Oops! It was supposed to be 1/2 a tsp of cinnamon (I forgot to half it) so i tried to get a little out before starting to whisk. I love cinnamon and I don't think it hurt the dish at all.

I poured the liquid evenly over the bread cubes making sure to get every single one wet. (I didn't want a crunchy crouton layer on top after it had baked.) Then I sprinkled 1/4 cup of brown sugar over the whole thing. I covered it up and let it sit in the refrigerator for almost 24 hours. The recipe recommends 8-24 hours, so it's a great dish to throw together the night before, whether you're having breakfast or dessert the following day.

The next day I baked it with a lid on for 20 minutes at 325 degrees, then took the lid off and baked it for 10 more minutes.

It was delicious...again! As a dessert I might call it blackberry bread pudding instead of french toast because it has the same texture and similar flavors (except for the cream cheese.) Also, even though I made smaller cubes of cream cheese there were still some distinct cream cheese bites. I wonder if it would work to melt the cream cheese with the jam so that I could pour it evenly over the bread cubes? I may just try that next time.

Wednesday, December 2, 2009

Mom's Chili

I was doing so well with the New England weather. I was able to go out on a fifty degree day and comment on how nice the weather was. I even appreciated the weekly rain that never fell on San Diego. However, I've had a setback that can be summed up in three words: Thanksgiving in California. I spent the last week sitting outside in a t-shirt for hours, getting hot in a light jacket, and (I'm ashamed to say) complaining when the temperature dipped down into the sixties and we had to go inside. It was a big setback. I returned to near freezing temps in Massachusetts. I was in bad need of some really good chili.

My mom's recipe has won some chili cook-offs in the past, and it is incredibly easy to make. I did make a couple of changes, but followed the same basic recipe. I used ground turkey instead of ground beef. For whatever reason, I have grown accustomed to ground turkey and actually prefer it to ground beef. So that's just what I buy now. Not by choice, I had to buy regular pinto beans. My new grocery store does not carry Ranch Style beans. If you have access to Ranch Style beans I highly recommend that you use them. I could swear that they have the same secret ingredient as Coca-Cola. I have licked my fingers after draining a can, and it has a hint of Coke! So delicious! I also substituted garlic powder for garlic salt and didn't notice a difference.

I sauteed a chopped medium onion in 2 T of butter until the pieces were soft.

I added one package of ground turkey (I think it's 1.3 pounds) and cooked it until I couldn't see any more pink. Then I drained off the fat.

Next I added a 46 oz bottle of tomato juice, a 15 oz can of beans, 2 T of chili powder, and garlic powder, salt, and pepper to taste. That's pretty much it!

After simmering for 30 minutes, the liquid thickens up a little and it is ready to eat!

I like mine with lots of cheddar cheese. Not quite the same as Mom's, but almost as yummy, and certainly satisfying on a cold December night!

Friday, November 20, 2009

Asian Style Pork Stir Fry

Yes, you read that correctly. Pork was in my kitchen. I have had very few experiences with pork, but none of them have been particularly tasty. In fact, most of the pork dishes I've tried were rather taste-less. I saw this stir fry recipe in my Bon Appetit Fast Easy Fresh cookbook a LONG time ago and wrote it down on a sticky note on the inside cover. I knew I would find it later :)

It calls for pork tenderloin which is one of the grossest looking items in the meat department. Plus they come in three pound packages and I only wanted half a pound. So I ended up buying tender chops.

I marinated them for an hour in a mixture of soy sauce, honey, minced fresh ginger, and crushed red pepper flakes.

I cooked the pork in a dry wok because the recipe said nothing about oil for this part. But when it came time to "wipe skillet clean" I couldn't. There were black crusties cemented to my non-stick wok. I washed and scrubbed and finally gave up.

Next I whisked together the extra marinade, orange juice, cornstarch, and red wine vinegar (it was supposed to be rice vinegar, but the last thing I need is another bottle of vinegar that I rarely use in my cabinet.) I cooked some frozen french cut green beans in peanut oil, then I added the pork back in along with orange zest, minced garlic, and the whisked liquids.

I waited until the sauce thickened, which also meant waiting until the green beans were thoroughly overcooked.

We spooned the stir fry over rice and chowed down. It was good, but a little bland. I'm starting to learn something. Maybe it's because I've watched a gazillion episodes of Top Chef where the judges complain about underseasoning. When a recipe says "season to taste" that means sprinkle some salt and pepper and then actually taste it! It seems obvious, but I'm just now understanding that it is very important. Salt brings out the flavor of things, so without it, food tastes bland. I think my fear of adding too much salt has made a lot of my dishes just ok, when they could be good. I'm trying to conquer this silly little fear of mine.

In case you were wondering, that is a Mary Englebreit "Congratulations" plate. We keep this plate at the bottom of our stack of normal dinner plates, so when we get to it, it's kind of like, "Congratulations: You've used all your plates! Now run the dishwasher!"

Sunday, November 15, 2009

Apple Pumpkin Cake

About a week ago I posted about baking bread from a book called Artisan Bread in Five Minutes a Day. Someone had left a comment (which I always appreciate) but I didn't realize right away that it was the author of the book! How exciting is that?! Not only does she write cookbooks, but she's an actual pastry chef and she writes a really great baking blog. I spent some time exploring her blog and I quickly found this recipe for Apple Pumpkin Cake.

I peeled and thinly sliced four Granny Smith Apples and then sauteed them in three T of butter until they were just starting to get soft. I took them off the heat and added three T of sugar and one tsp of cinnamon. Now, those of you who read this blog regularly will remember my quest for a baked apples side dish that resembles the Stouffer's version. Well forget the last post. This is way better. Almost perfect, and much faster.

I put the apples off to the side and got to work on the cake. What is great about this recipe is that the streusel topping and the cake batter start of in the same bowl. At a certain point you take out a little and reserve it for later. Then you add baking soda, pumpkin puree, sour cream, and eggs. I didn't take a picture because I feel like I've made a lot of orange batters in my stand mixer lately, so I thought I would spare you another one.

Then, as shocking as it is, I got out my springform pan! I've had it for more than four years and this is only the second time I've used it! I was very excited! I coated it with Pam for Baking (an awesome invention) and poured in the cake batter.

The apples went on top of that.

To the reserved streusel topping I added some homemade pumpkin pie spice. I'm not the kind of gal who wants another spice jar cluttering up my cabinet, especially when I have all the ingredients on hand already. For one tsp of pumpkin pie spice: combine 1/2 tsp ground cinnamon, 1/4 tsp ground ginger, 1/8 tsp ground nutmeg, and 1/8 tsp ground cloves. Easy!

Here's what it looked like before baking:

And here is what it looked like after baking and cooling:

Beautiful!

This cake was delicious! The apples, the pumpkin, and the spices just scream fall! Mmmmmm! Thanks for the recipe Zoe!

Wednesday, November 11, 2009

Stir Fry Sesame Beef

I love my mom's stir fry. I always request it when I'm home. I've tried to recreate it with little success. My stir fry, even when I follow the exact same recipe, is edible, but not delicious. Brett thinks it's the quality of the beef, but I'm pretty sure that my mom gets her beef at the grocery store; there's not some mystery butcher with fabulous stir fry beef that she goes to. So if it's not the beef, then it's either my equipment or me that's the problem, and I don't want to admit to either one of those. I had pretty much given up on making stir fry until I was making the menu for the week and stumbled across some recipes that sounded pretty good.

What really caught my eye about the sesame beef recipe in my "Bon Appetit Fast Easy Fresh" cookbook was the hoisin sauce. I LOVE hoisin sauce. The recipe calls for asparagus, but I immediately switched that to broccoli (and lessened the amount). I could have used more toasted sesame seeds as not all of the meat was coated. I also made the decision to blanch the broccoli first because I hate undercooked broccoli.

I got everything prepped first as anyone who's ever cooked stir fry knows to do.

I cooked the sliced red onion and broccoli florets in canola oil for about two minutes.

Then I added the beef for about 3 minutes, until it was completely brown.

Then I turned down the heat and added 2 T of hoisin sauce and 1/3 cup of water, and let it bubble for about two minutes. The sauce was very thin. I think it would have been better to just add the hoisin sauce, see how the thickness was, and then gradually add the water little by little. I let the sauce bubble a little longer with the hopes of thickening, but it did not happen. Lastly I dumped in two teaspoons of sesame oil. Again, it would have been better to add a little bit, taste, and then maybe add more. It ended up with too much sesame oil.

The final product was ok. The meat was not very tender, the broccoli was sadly overcooked (which is better than undercooked) and the sauce was way too thin. Lessons learned. We might see this one again with some key changes, but then again we might not.

Monday, November 9, 2009

Artisan Bread in Five Minutes a Day


I've known about this book for a while and happened across it in the massive cookbook section at my new library.

It seemed too good to be true. Recently Brett and I needed bread but were too lazy to go to the store, so we decided to make it from scratch. Well, luckily we thought of this four hours before dinner because that's about how long it takes to make homemade bread. There is a lot of rising and waiting involved. So I was excited to try the "revolutionary" new method of bread baking that will supposedly take five minutes.

Part of what makes this method take only "five minutes" of your time is that you mix up a giant batch on the first day and keep it in your refrigerator pulling off hunks each day. But the mixing of the dough doesn't take as long as usual either because there is no proofing the yeast, no kneading, no covering and rising (kind of), and no punching down the dough. Brett, of course, was dubious of this method. It really does take all the fun out of baking bread. If you have never punched risen dough, I highly recommend it.

I decided to go with the first recipe in the book since it seemed the most basic- Boule (Artisan free-form loaf.) I used the flour I had on hand which is not the kind they recommend. I also halved the recipe and therefore messed up slightly on the measurement of the yeast and the salt. I should have halved it ahead of time but instead I waited until I had my water already hot and ready to go. Needless to say, my math was rushed. Quick: What's half of 1 and 1/2 T? And don't say 3/4 T because I don't have a 1/4 T measure. Answer in teaspoons please. See? Not that easy. Afterwards, I thought it through and realized I was off by a 1/4 tsp.

Once you've stirred everything up, you put a lid on it and leave it on the counter for a couple of hours and then you move it to the fridge.

After a couple of days in the fridge, I decided it was time to bake. I pulled off a handful of very wet dough. It is supposed to be wet- that is what makes it able to sit in the fridge for up to two weeks. I pulled dough from the top down to the bottom on all four sides to form a "gluten cloak" I don't know if I did this right, but it seemed ok. Then you let it sit on a pizza peel for forty minutes.

This is where I take issue with the book's title. You still have to be thinking ahead to make this bread for dinner. This isn't a Pilsbury "pop it out of the tube and you're done" kind of thing. You have to let the dough rest, let the pizza stone heat up, bake the bread, and let the bread cool. A process I will say takes at least an hour and forty minutes and that's if you don't let the bread cool all the way. So yes, you spend about five minutes of active work, but you still have to have a good deal of forethought.

The bread turned out beautiful. It was slightly misshapen from my poor pizza peel skills, but golden and very "artisany" looking. The recipe said to let it cool completely, but we couldn't wait any longer. The outside was very hard. I ended up peeling the crust off and eating it first, saving the squishy, wonderful innards, or "crumb" if I'm being fancy. I prefer innards:) It was ok. Most, if not all, of the other yeast breads we've made were better. Brett thought the innards were like the texture of dumplings. They were soft and chewy, but kind of sticky and dense. The flavor was not all that great- I'll blame that on the flour.

I will be the first to admit that I did not execute the recipe entirely accurately, but it was not good enough to merit a second chance. Maybe this method would work for you, but for us it's back to old fashioned (fun) bread.

Friday, November 6, 2009

Kim vs. The Smoke Detector

We lived in the same tiny apartment in San Diego for five years and set off the smoke alarm once, with good reason. We accidentally set a piece of wax paper on fire.

Since we have moved, we have set the smoke detector off four times in four weeks. Twice for bacon, once for pizza, and once for a steamy shower. Can you believe that our shower set it off?! None of these incidents were emergencies or anything more than the normal smoke that you get when you cook. I'm convinced that most people don't cook and that people who might cook would be deterred by a super-sensitive smoke alarm.

Solution number one: open the sliding door after the smoke alarm goes off. Sure it lets our heat out and the weather is getting chilly, but it gets the smoke out too. Not a viable solution, plus we still have to listen to the alarm.

Solution number two: turn on the exhaust fan and close the bathroom door when showering. Ok, this one works for the steamy shower problem but does nothing to help with the cooking. It's only a partial solution

Solution number three: Ask maintenance if there's anything they can do. "Live with it," they said.

Solution number four: Don't cook meats, especially bacon. Do-able but it limits our menu, and I don't like that.

Solution number five: Turn on the microwave vent and watch as the smoke does not get sucked to an outside vent, rather gets blown right back into the kitchen. Surprisingly, this is the solution that actually works.

Last night was the big test for solution number five. I made grilled chicken fajitas using my grill pan. The whole kitchen got smoky, but the smoke alarm did not go off! Maybe the microwave filters the smoke before it sends it back out. Maybe the vent back into the kitchen pushes the smoke in a direction where the smoke detector can't find it. We were amazed, but happy that we've found solution.

Saturday, October 31, 2009

Roasted Pumpkin Seeds


Happy Halloween! Earlier this week Brett and I cut into our pumpkins to make our jack-o-lanterns. I love the smell of pumpkin innards; it reminds me of childhood. Pulling the innards out feels so gross, but I love it too. This year, instead of throwing everything away, we made sure to separate the seeds from the guts for a tasty treat.

I washed them off as best I could and then let them dry on wax paper overnight.

I hadn't had roasted pumpkin seeds since I was a little girl, but I distinctly remember liking them. I asked my mom how she prepared them and she said just butter and salt. I looked online and discovered many recipes used either butter or canola oil and salt. So simple! After a little more searching, I found this recipe on allrecipes.com. It had worcestershire sauce, garlic salt, salt, and butter. I was sold. We decided to make two different batches- one classically seasoned with canola oil and salt, and another spiced up a bit.

After stirring all the ingredients in a bowl, I poured the seeds out onto a cookie sheet and spread them out a little bit. For the classically seasoned ones I stirred the olive oil into the measuring cup of pumpkin seeds and then sprinkled the salt on after I had spread them out on a separate cookie sheet. It seemed easier that way.

They went into a warm 275 degree oven for an hour. I stirred them once, halfway through.

Once cooked, I spread them out on paper towels to let them cool for a short while.

Both varieties were delicious! It is hard for me to choose a favorite!